Drip edges are often ignored, by roofers and homeowners to cut costs. However, you cannot overlook the importance of drip edges. This feature in roofing is most common in areas that experience storms. To understand the importance of putting up a drip edge on your roof, you have to know how and why a drip edge is applied.
Here are some answers to the most common drip edge related questions.
What Is a Drip Edge?
A drip edge is the metal flashing located at the edge of the roof. It is generally a non-staining and non-corroding material, applied on a roof’s edge to let water filter out of the roof system. Roofers install the drip edge with an intended tilt, specifically meant to direct water away from a roof. It assures the foundation of your roof is not exhausted prematurely by holes or fissures.
Placing Drip Edges
Experienced roofers say that roof drip edges should always be placed on top of the roof’s exterior cover. The placement should be between the sheathing and the fascia board. Thus it acts as a drainage gap between the drip edge and the fascia board. It will improve the drainage water flow and protect the roof from potential water damage.
Attaching Drip Edge
Professional roofers slip the wide, level metal flange under the first course of roof shingles. They extend the outer edge over the gutter and secure the drip edge with roofing cement. Roofers generally use short roofing nails to fasten the ends of the drip edge. To be cautious, they also hammer the nails in high up under the shingles.
When should Drip Edge Be Installed?
Ideally, you should install a drip edge when installing new shingles. Although, you can install drip edges at any time. A drip edge eave strip is of galvanized metal, but roofers think that a vinyl-coated aluminium eave strip is better because aluminium won’t rust.
Should I Overlap Drip Edge?
You should see that the drip edge is nailed high on the shingles so that the shingles cover the nails. Nail them at every twelve inches, and the next drip edge piece should overlap the first by an inch. Be careful not to; leave gaps between the drip edge applications.
Painting Drip Edge
Painting and priming a roof edge protects the roof edge from moisture damage. The primer lays down a foundation of sealant, and water-resistant paint complements the primer by enacting a waterproof barrier.
Reusing Drip Edge
While repairing the roof, some roof components are changed. Among them, the flashing and drip edges are primary components. It is necessary as a waterproof seal around all critical components is essential to prevent leaking. Replacing drip edges will protect surrounding fragile architectural elements like fascia.
Why Is Drip Edge Important?
Drip edges act to preserve the appearance of your roof, and they shield your property from potential damages:
Prevent insects and other small pests from entering the space between the fascia board and the deck. Drip edges save the shingles from potential water damage during rainstorms. They facilitate water away from the fascia and reduce the risk of its erosion and help the gutters to move water away from the house and its base. Drip edges keep the roof safe from strong gusts of wind and wind-blown rain. It also increases the lifespan of the roofing materials.
Is the Gap Important?
Leaving a gap between the overlay may result in water flowing behind the Drip Edge to damage your home and roof system. You can fix it by placing a drip edge under the first row of roof shingles. Take care that the exterior Drip Edge is reaching over Gutters. If the Gutters are lower than the bottom edge of the drip edge, you should remove the gap by installing flashing behind the drip edge and over the back edge of a Gutter.
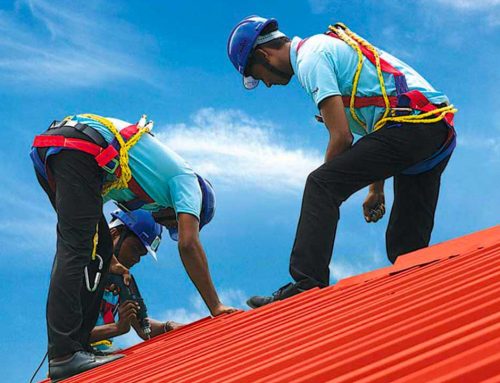
Always select an experienced team of roofers to install, repair or get work on roofing done right. For details on roofing projects do visit www.dynaroof.com.